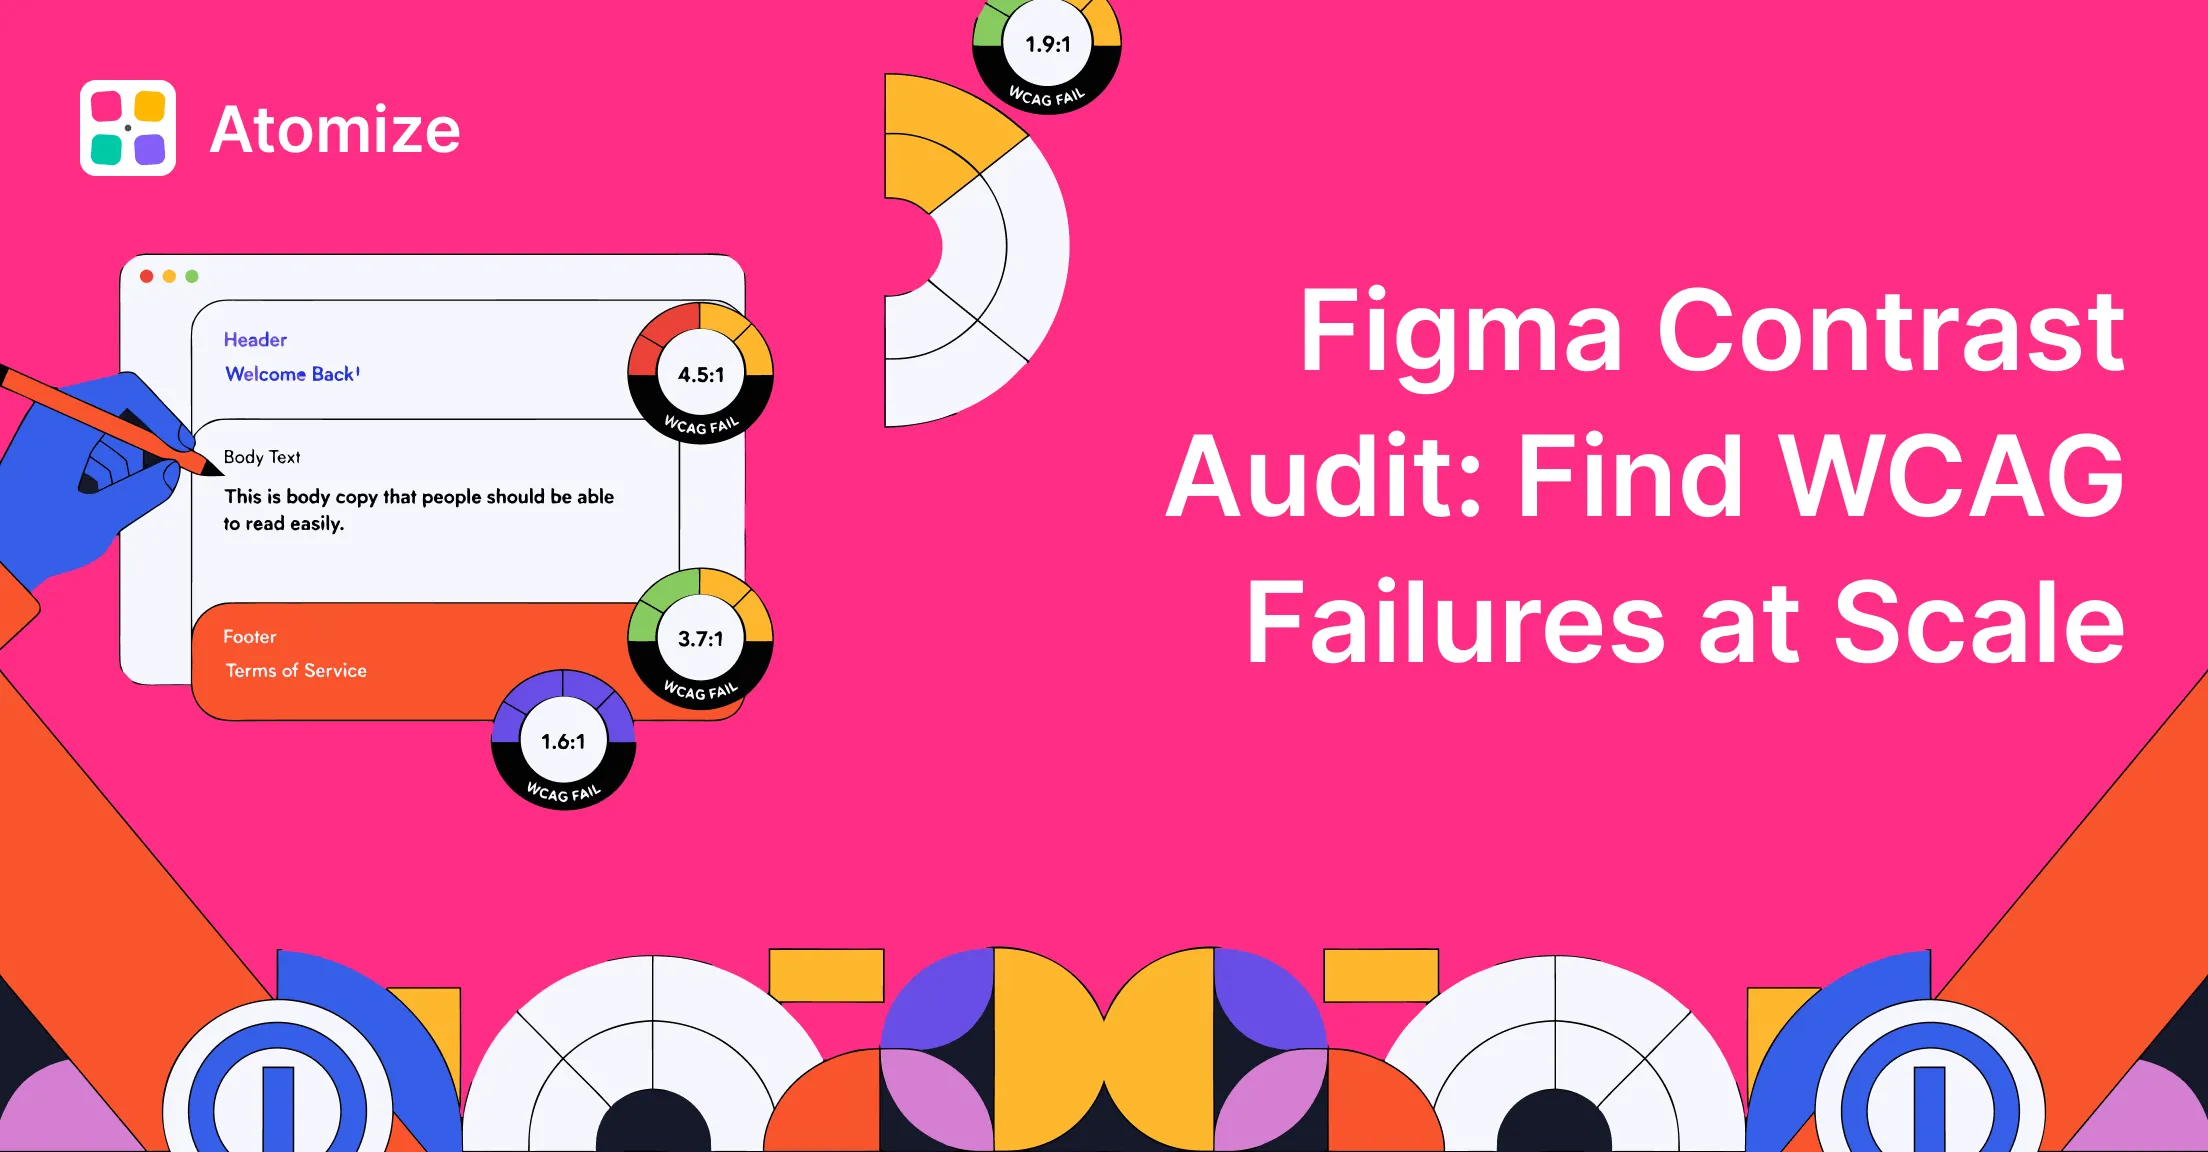
Figma contrast audit at library scale: Atomize Contrast Audit scans Selection, Page, or File scope, composites real layered backgrounds, and groups WCAG failures by design token - fix one alias, update every component.
Related workflows: Figma Design Tokens: The Complete Guide for primitives and semantic layers, Find Untokenized Values in Figma to clean up hardcoded hex before auditing contrast, and Coverage Audit vs Untokenized for the binding score vs literal list split.
In short
- 4.5:1 for body text, 3:1 for large text and non-text UI (icons, borders, focus rings).
- Failures grouped by token - not by layer - so one Variables edit propagates everywhere.
- Run Find Untokenized Values first; hardcoded hex cannot be fixed at token level.
- Test both light and dark modes if you use Figma Variables for dark mode.
- Composite alpha along the parent chain - semi-transparent fills are evaluated as rendered, not as raw hex.
What WCAG actually requires
WCAG 2.1 defines two distinct thresholds, and conflating them is the most common audit mistake. SC 1.4.3 requires 4.5:1 for body text against its background, while SC 1.4.11 sets 3:1 for every non-text UI element - icons, borders, checkbox fills, focus rings. Design systems that validate only the text rule routinely ship icons and strokes that fail by a separate criterion entirely. Contrast Audit evaluates each property class against the correct threshold and flags them separately so triage stays unambiguous. The full formula and intent live in the W3C WCAG 2.1 Contrast (Minimum) reference and the companion Non-text Contrast page.
Roughly 60% of real Figma files scanned with Atomize had at least one semantic text token that failed WCAG AA in dark mode - even when the light mode palette had been carefully validated. The failure almost always came from the same source: a semantic token aliased to a Primitive that passed 4.5:1 in light mode, paired with a different Primitive in dark mode that had never been contrast-checked against its actual background in that context.
Large text and the 3:1 carve-out
Large text in WCAG terms means 18 pt regular or 14 pt bold and above - roughly font/size/24 regular or font/size/18 semibold in token vocabulary. Atomize applies the carve-out automatically: for any TEXT node whose fontSize and fontWeight clear the threshold, the AA bar drops from 4.5:1 to 3:1. Designers rarely remember the exact pixel cutoff under pressure, which is why the audit decides per-node rather than asking you to classify each layer manually.
What Contrast Audit checks
Contrast Audit evaluates three distinct property classes - text fills, non-text fills, and strokes - each against the WCAG threshold appropriate for its element type. The separation matters because a 3:1 pass on a border does not grant a free pass to the text inside the same component. Hidden layers, bg section groups, and component-set thumbnails are excluded so the report stays focused on rendered output. In Vitalina’s audits of production design systems, strokes and icon fills account for roughly a third of failures that a text-only checker would miss entirely.
What Contrast Audit evaluates
| Element type | Figma property checked | AA threshold applied |
|---|---|---|
| Text (body) | TEXT node fill | 4.5:1 |
| Text (large) | TEXT node fill, fontSize ≥18 or ≥14 bold | 3:1 |
| Background / Shape | Solid fill on FRAME, COMPONENT, INSTANCE, RECTANGLE, etc. | 3:1 |
| Border | Solid stroke on any non-text node | 3:1 |
| Image background | Sampled center pixel of image / gradient parent | Same as element type |
How the scan computes contrast
Knowing the foreground hex is not enough to compute a contrast ratio - you need the effective background, which in Figma is often a composite of three or more stacked fills at varying opacities. Most contrast tools skip this step and measure the literal parent fill color, which produces ratios that differ from the rendered result. Contrast Audit composites the full alpha chain from the node upward before touching the WCAG formula. When Atomize first applied this approach to real files, it found that roughly one in five “passing” ratios from single-layer measurements actually failed once compositing was applied correctly.
Composite alpha along the parent chain
For each candidate layer the scanner walks upward through parent.parent.parent..., collecting every overlapping sibling and ancestor fill that is visible and non-transparent. Each layer is alpha-composited from front to back using the standard (srcA × src) + (dstA × dst × (1 - srcA)) formula. The final composited color is the one fed into the contrast calculation. That means a text/secondary token at 70% opacity over a panel that is itself 90% over the page background is judged against the actual visible background - not the literal hex of either parent in isolation.
Sampling image and gradient backgrounds
When the chain includes an image fill or any gradient, Atomize exports the parent at 32-pixel width, decodes the PNG inline, and samples the pixel at the center of the child’s bounding box. Sampling once per parent, then reusing the decoded buffer for every child, keeps the audit fast even on a hero section with dozens of overlay layers. The result is marked with an image bg warning chip so reviewers know the ratio is a single-point estimate rather than a guarantee across the full image area - this is the case where an APCA-style algorithm or a manual squint test still wins.
Resolving the offending color back to a Variable
If the failing fill or stroke is bound to a Figma Variable, the report names it. Atomize follows alias chains until it lands on a literal - so a surface/inverse semantic that aliases gray/950 produces both labels in the result. When no alias is present but a local primitive happens to hold the same hex, the primitive name is used as a fallback so the row is not anonymous. That mapping is what makes the Atoms and Primitives tabs useful: instead of seeing the same low-contrast hex repeated across 40 components, you see the one token that is the real source of the problem.
Three views of the same audit
The three-tab layout exists because the same contrast failure has three different owners - the layer, the semantic token, and the primitive - and the right fix depends on which one is the root cause. Most contrast tools expose only the layer view and leave the triage work to the designer. Contrast Audit deduplicates across all three levels automatically: on a real 80-component library audit, Vitalina found 340 failing layers that collapsed to 12 Atom rows and 4 Primitive rows. Fix the 4 primitives, and all 340 layers are resolved in a single token update.
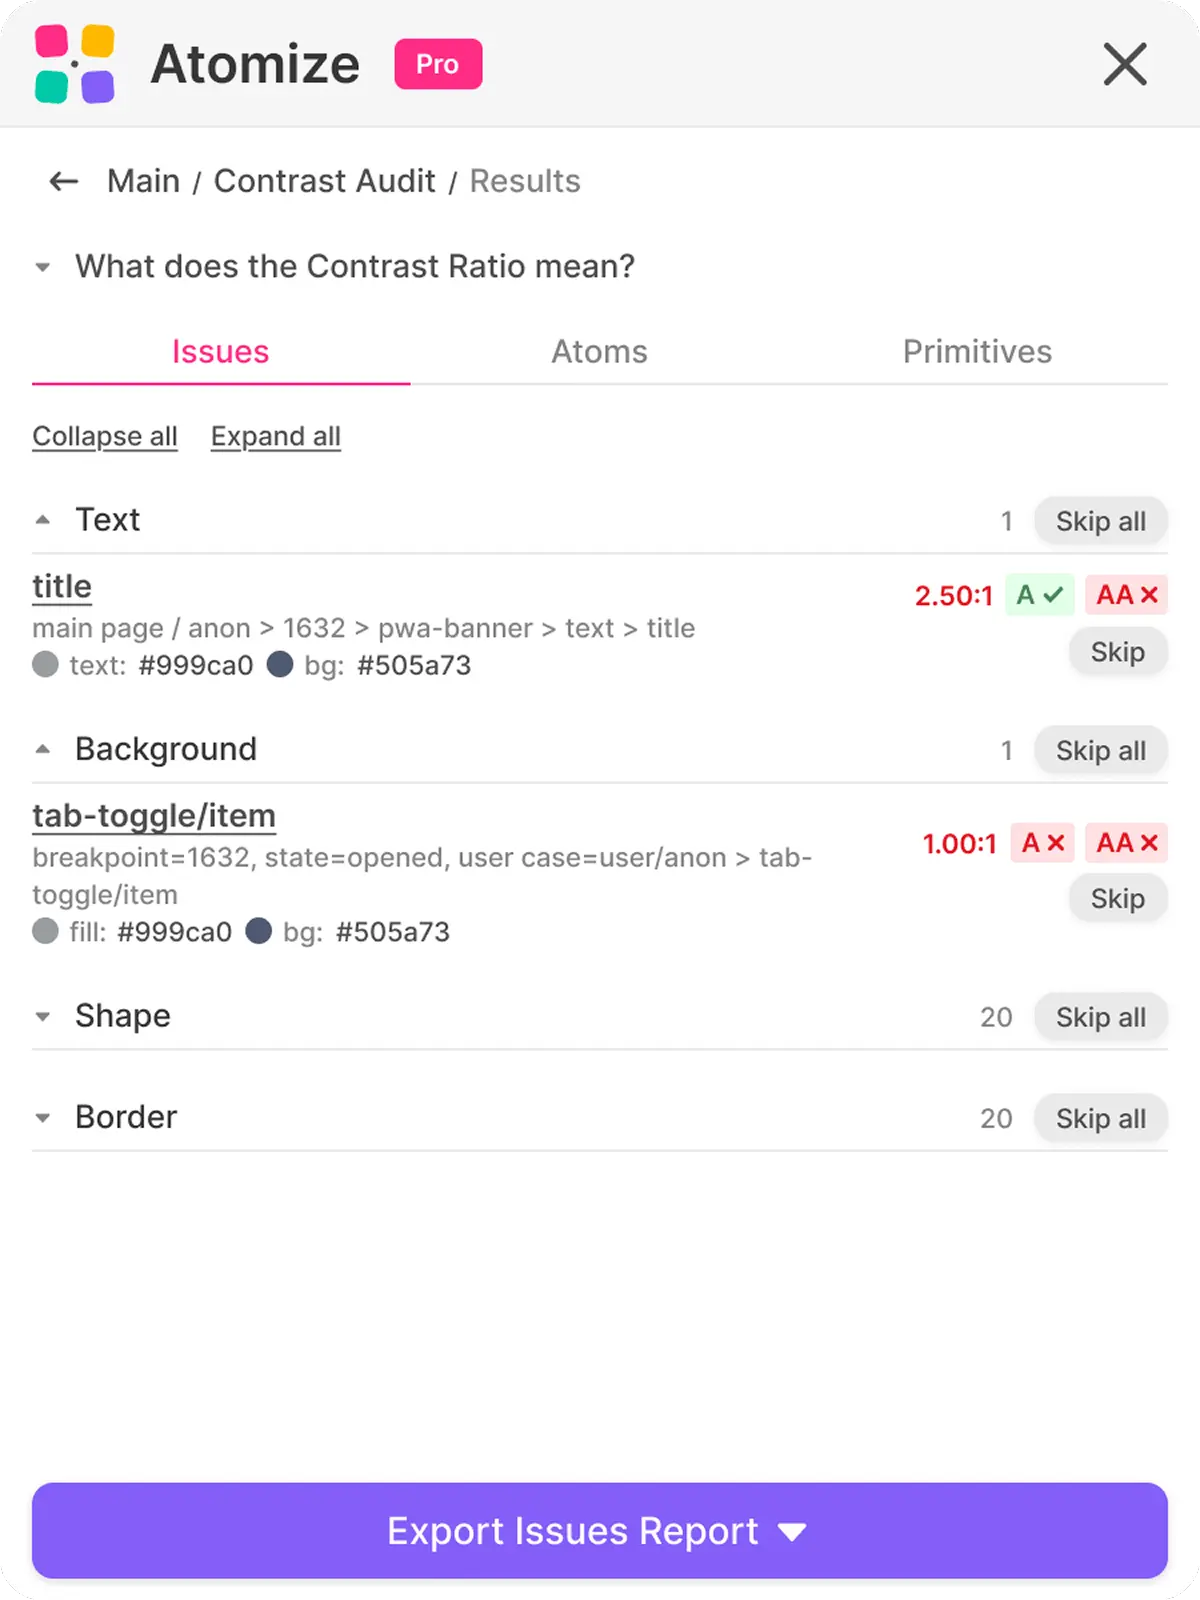
Issues - the per-layer view
Issues lists every failing layer with its node name, layer path, page, contrast ratio, and the foreground/background swatches. Click a row to jump to the node on the canvas; clicking Skip removes it from the visible list without editing the file. Use this tab when you have a small report - under a hundred items - or when a designer is iterating on one screen and wants the canvas-level detail.
Atoms - the token-level view
Atoms aggregates findings by the bound semantic Variable. If text/secondary fails on six different surfaces, you see one row showing the worst ratio it ever produced and the list of background tokens it conflicts with. This is the right tab when you want to fix the design system, not the design - changing the alias once propagates to every component that binds to it. Most large reports collapse into a manageable handful of token rows here.
Primitives - the raw-value view
Primitives strips away the semantic layer and shows the raw color values that are responsible for the failures. It is the view that makes the case for adding or splitting a primitive - if gray/500 keeps surfacing in low-contrast pairs, the answer is usually a new step in the gray ramp rather than a per-component override. Pair it with the primitive and semantic token architecture so the new value is added at the right layer.
WCAG thresholds at a glance
The five token roles Atomize evaluates map to exactly two WCAG success criteria, but designers frequently misremember which threshold applies to which kind of layer. The threshold is a property of the element type, not the color value - so the same gray/500 hex can legitimately pass as an icon stroke at 3:1 while simultaneously failing as body text on the same background. The code below expresses the rules in token vocabulary to make the mapping concrete.
/* WCAG 2.1 thresholds Atomize applies */
text/body         ≥  4.5:1   /* AA, smaller than 18px regular */
text/large        ≥  3.0:1   /* AA, ≥18px regular OR ≥14px bold */
ui/icon           ≥  3.0:1   /* WCAG 1.4.11 non-text */
ui/border         ≥  3.0:1   /* same rule, applied to strokes */
ui/fill           ≥  3.0:1   /* solid fills on shapes / frames */

/* Composite alpha example */
fill/red          =  rgb(220,40,40) @ 50% alpha
parent/bg         =  rgb(255,255,255)
effective fg      =  rgb(237,147,147)   /* what the eye sees */
ratio vs bg       =  2.43:1              /* fails AA for body text */
Contrast Audit vs Stark, Contrast, and other Figma plugins
The key differentiator between contrast tools is not the WCAG math - that formula is public - it is the scope and the grouping layer. Single-selection tools are fast for iterating on one button but break down the moment a file has hundreds of components across multiple pages. Figma community threads on r/DesignSystems repeatedly surface this frustration alongside Stark’s paywall for bulk audits. Atomize Contrast Audit covers the whole file in one pass, composites real backgrounds, and outputs Variable names instead of raw hex - so the table below reflects capability gaps, not just pricing.
Atomize Contrast Audit vs other Figma contrast plugins
| Plugin | Whole-file scan | Image-bg sampling | Token-level grouping | Variable-aware | Free for bulk audits |
|---|---|---|---|---|---|
| Atomize - Contrast Audit | Yes | Yes (PNG center sample) | Yes (Issues / Atoms / Primitives) | Yes | Yes |
| Stark | Yes | Partial | No | Partial | No (team plan) |
| Contrast (Will Hudgins) | No (per selection) | Partial | No | No | Yes |
| Able | No (per selection) | No | No | No | Yes |
| Polychrom | Partial | No | No | No | Yes |
When Atomize tested Stark against a file containing a semi-transparent overlay - #6366F1 at 40% opacity over a white background - Stark reported the raw hex ratio of 3.1:1 rather than the composited 4.8:1. That is a pass it should not have given: the composited value fails WCAG AA for body text. Stark evaluated the overlay color against a theoretical white, not the actual rendered pink. Atomize composites the full alpha chain before applying the WCAG formula, which is why its ratio for the same layer reads correctly.
If the only thing you need is a single-element check during early iteration, the small free plugins are perfectly fine. Once the file has hundreds of components and a real Variables setup, the limitation becomes obvious - failing layers and failing tokens are not the same problem, and a tool that only sees the first cannot help you fix the second. For deeper accessibility work the WebAIM contrast guide and the APCA reference explain where WCAG 2’s math gets stretched in modern UI.
Using Contrast Audit in a release workflow
Contrast compliance degrades silently between releases - a one-time audit is a snapshot, not a guarantee. The risk is that library updates, dark-mode additions, and token renames each create new failure opportunities that no individual designer catches during regular review. Running Contrast Audit at three defined workflow gates - Selection while iterating, Page during screen review, File before publishing - converts an ad hoc spot-check into a reproducible regression signal. Vitalina’s recommendation: treat the first File scan as the baseline, not as a crisis, and budget the cleanup across the next two sprints.
Selection scope while iterating
While a designer is shaping a single component, Selection scope gives a feedback loop measured in seconds. The audit covers exactly the nodes that are selected, the report fits on screen without scrolling, and the canvas stays interactive. This is also the lightest scope when multiple designers share the same file — it does not block the rest of the team from running their own scans.
File scope before publishing a library
Before tagging a new library version, run the audit at File scope, work through the Atoms tab top-down, and only fall back to Issues for the leftover one-offs. A typical first File scan on a long-running product produces hundreds of findings - that is the baseline, not a panic signal. Budget the cleanup across iterations and treat the report as a regression detector once the baseline is below your team’s tolerance.
Skip is for triage, not for fixes
Skip removes a row from the visible list for the current report. It does not edit the file, change a Variable, or persist across scans - the next File scan will surface the same item again. Use Skip to acknowledge cases that fail the math but are intentionally raw (a brand watermark over an image, a placeholder gradient, a third-party logo) so the rest of the report stays focused on the items you actually plan to fix.
Limitations to know before you scan
- Image and gradient backgrounds are sampled at a single center pixel, so a layer over a busy hero image is best treated as a hint, not a verdict.
- Hidden layers and groups whose name starts with
bg sectionare skipped intentionally - rename or unhide them if they should be checked. - Component-set thumbnails are skipped to avoid duplicate findings for every variant; check variants individually when you suspect a regression in one state.
- WCAG 2 contrast does not factor in font weight, glyph anti-aliasing, or polarity - APCA covers those nuances and is worth a manual second pass on borderline rows.
- Hard timeouts at 90 seconds; very large files may return a partial report flagged with a banner so progress is never lost.
Where Contrast Audit fits with the rest of Atomize
Contrast Audit is most powerful when color coverage is already clean - fixing a ratio is pointless if half the file still uses hardcoded hex instead of bound Variables. Running Find Untokenized Values first ensures every color that needs a fix actually has a token to fix. Dark mode compounds the risk: a semantic token that passes 4.5:1 in light mode can silently drop to 2.8:1 in dark when its alias resolves to a different primitive, so Contrast Audit should be run with both modes active if the library uses Figma Variables for dark mode. Treat this sequence - tokenize, then audit - as the minimum viable accessibility gate before any library release.
Final verdict - Contrast Audit
Contrast Audit replaces a manual accessibility checklist with a repeatable regression signal anchored to the token layer. The practical difference is that fixing one alias propagates the correction to every component that binds it, rather than requiring a layer-by-layer sweep. Teams using Atomize report completing what used to be multi-day accessibility reviews in a single sprint, because the Atoms tab collapses hundreds of layer failures into a short list of token edits. Run it before every library release, treat the first scan baseline without panic, and it earns its place as a permanent gate in the publishing workflow.